|
you have Guest user access (not logged in)
|
||
      visitors since May 2003 ClubSite © ver 1.3 |

|
|
click here to return to the gallery list
|
Viking
26 Wide Beam - DIY Dinette -
by Andy Lawrie
|
||
|
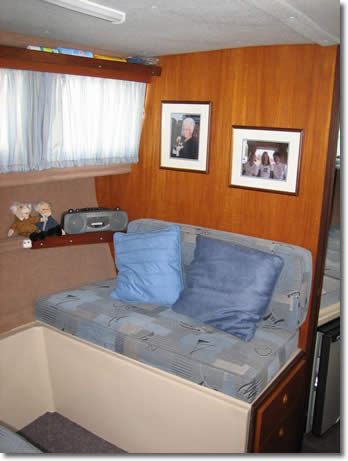
I find there are several disadvantages with this arrangement. Firstly, I find it plain uncomfortable to have such a small contact area against my back when I lean backwards. Secondly, the curved sections prevent the persons next to the windows from sitting close to the side of the boat and make it more cramped when 2 people sit each side of the table. And finally, the curved parts prevent the bed infill sections from being stored in the dinette area. The following modification, in my opinion, improves all three areas.
The first step is to remove the pieces of padded ply – easily done.
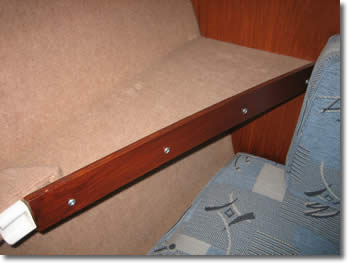
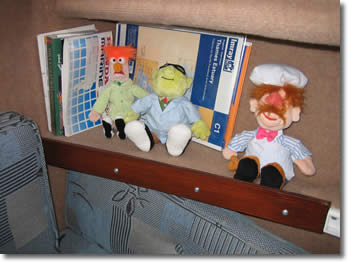
The shelves in the corners of the dinette than have to be reshaped – the bed infill sections are going to be used as seat backs, and the shelves must be reduced in width so the seat backs do not protrude into the gangway. I used a fretsaw, and it probably was the most fiddly part of the job. Be aware that if you do this part you really have committed yourself to the modification. I made the new shelf edges more or less completely straight, and then finished the edges with strips of stained ply in the same way as the shelves described elsewhere.
Finally, I fitted press studs to the seat backs and the bulkheads so they stay in place.
The first ‘photo is a close up of the forward shelf after it has been cut down in size, and the second ‘photo is the shelf next to the loo. The final ‘photo is an overall picture of the new arrangement of seat and shelf
(Many
thanks to Andy for his kind permssion to include his © photos and
text on this site) |
||